Like administering on-premise Active Directory using PowerShell, you can also use PowerShell to manage Azure AD; below are some basic PowerShell commands to manage Azure Active Directory.
First, you need to install the Azure module for PowerShell, which will provide you with Azure cmdlets inside PowerShell; the command to do this is:
Install-Module -Name Az -AllowClobber -Scope CurrentUser

Note: if you want to install the command for all users, change -Scope to AllUsers
After install, you can run the following command to see the installed modules:
Get-InstalledModule

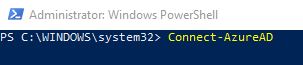
You will now need to connect to your Azure AD; you can do this by running this command:
Connect-AzureAD
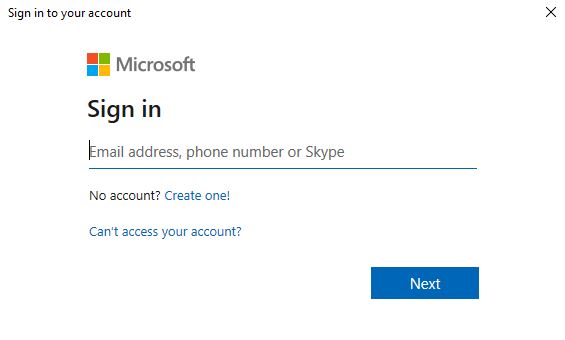
You will then be presented with the login screen for Azure AD; use your Azure login details.
To Manage Users
To get basic information on an Azure AD user, use the following command:
Get-AzureADUser -ObjectId user@domain.com
To get detailed information on object use:
Get-AzureADUser -ObjectId user@domain.com | fl

We can use further user attributes to find user account details, such as filtering on Given name starting with:
Get-AzureADUser -Filter “startswith(GivenName,’Zahid’)”

Another useful command is to check for disabled accounts; you can do this by running the following command:
Get-AzureADUser -All $true -Filter ‘accountEnabled eq false’

The command can be modified to filter data further by using this command:
Get-AzureADUser -All $true -Filter ‘accountEnabled eq false’ | select DisplayName,UserPrincipalName,Department

To set a password on a user account in Azure AD
Set-AzureADUserPassword -ObjectId migrate.dummy4@cloudthing.com -Password (ConvertTo-SecureString -AsPlainText “p@ssw0rd” -Force)

This is a similar command to above, setting a password for a user account but forcing the user to change the password at the next login.
Set-AzureADUserPassword -ObjectId migrate.dummy4@cloudthing.com -Password (ConvertTo-SecureString -AsPlainText “p@ssw0rd” -Force) -ForceChangePasswordNextLogin $true

This is the same command as above, but put into a powershell script. It allows user passwords to be set for users from a CSV file, just save the file as a .ps1 file.
# Set the new password
$newPassword = ConvertTo-SecureString -AsPlainText “p@ssw0rd” -Force
# Import users from CSV
Import-Csv “C:\PS_Files\users.csv” | ForEach-Object {
$UserPrincipalName = $_.”UserPrincipalName”
#Un-comment the below line and comment out the above $newpassword line if the CSV will include the password for all users
#$newPassword = ConvertTo-SecureString -AsPlainText $_.”Password” -Force
# Reset user password.
Set-AzureADUserPassword -ObjectID $UserPrincipalName -Password $newPassword -ForceChangePasswordNextLogin $true
Write-Host ” AD Password has been reset for: “$UserPrincipalName
}

To Manage Mailboxes (Exchange Online)
To Install Exchange Online Module:
Install-Module -Name ExchangeOnlineManagement -Scope AllUsers
To connect to Exchange Onlne:
Connect-ExchangeOnline -EnableErrorReporting -LogDirectoryPath c:/ExchangeLogs -LogLevel All
To get a count of all mailboxes:
(Get-EXOMailbox).count
To get all mailbox results with filtered output:
Get-EXOMailbox | select DisplayName, UserPrincipalName, Alias, RecipientType, RecipientTypeDetails
To get all mailbox results with filtered output:and save to csv file:
Get-EXOMailbox | select DisplayName, UserPrincipalName, Alias, RecipientType, RecipientTypeDetails | Export-Csv C:\PowershellOutput\Exchange\Mailbxoes.csv
Get all mailboxes and pipe it through to retrieve Mailbox statistics and filter on specific details:
Get-EXOMailbox | Get-MailboxStatistics | ft DisplayName, UserPrincipalName, Alias, RecipientType, RecipientTypeDetail
Get all mailboxes and pipe it through to retrieve Mailbox statistics and filter on specific details and save to csv file:
Get-EXOMailbox | Get-EXOMailboxStatistics | select DisplayName, totalitemsize | Export-csv C:\PowershellOutput\Exchange\mailboxSize.csv
This command is used to get details, such as UserPrincipalName, ForwardingSmtpAddress and DeliverToMailboxAndForward.
Get-EXOMailbox Username@Domain.com | select UserPrincipalName,ForwardingSmtpAddress,DeliverToMailboxAndForward

To get a full lst of information relating to the mailbox this command can be used:
Get-EXOMailbox username@domain.com | fl

To Manage Devices
This command will get a list of all devices in Azure and display only the selected information, such as Display Name, Device Trust Type, Approximate Last Logon time, etc. It will also export this information to a CSV file.
Get-AzureADDevice -All $True | select DisplayName, DeviceTrustType,DeviceOSversion, DeviceOSType, ApproximateLastLogonTimeStamp, @{n=”Owner”;e={(Get-AzureADDeviceRegisteredOwner -ObjectId $_.ObjectId).DisplayName}} | Sort-Object Owner | Export-Csv C:\PowershellOutput\ActiveDirectory\All_Computers.csv

This command is similar to the one above but adds the information to a variable which many other commands can reference:
$alldevices = Get-AzureADDevice
foreach ($item in $alldevices) {
Get-AzureADDevice -ObjectId $item.ObjectId | select DisplayName, DeviceOSType, ProfileType, ApproximateLastLogonTimeStamp
}
OneDrive
This is the command used to install the module to administer OneDrive:
Install-Module -Name Microsoft.Online.SharePoint.PowerShell

To connect poswershell to the service to manage OneDrive.
Connect-SPOService -Url https://domainname-admin.sharepoint.com

Provisioning a Business OneDrive, this is useful for when doing a migration
Request-SPOPersonalSite -UserEmails Dummy.Account@domain.com

This is an ever growing document and more will be added over time..